Get Happiness Is A Magnet WordPress Theme at 60% Off. Use code SALEHAPPINESS at checkout!


How to Use WordPress Categories
What are WordPress Categories?
WordPress Categories allow you to group your post content into different sections. For example, if someone blogs about food then they could have their posts in categories such as desserts, appetizers, main dish, etc. If someone has a lifestyle blog then they could place their posts in categories such as wellness, travel, beauty, etc. You get the idea.
When creating a post and no category is specified, then the default ‘uncategorized’ will be used. I will explain a little later how to change the default category but first you will need to know how to create a category.
Also keep in mind that different WordPress themes will display your category pages differently. Take a look at Adore Me’s theme Pinterest style category page. Knowing how your category page will look, will help you determine the size of your photos you will need too.
How to Create a Category
There are 2 different ways to create a category. You can create a new category when creating a post or directly from the category screen. Either of these 2 options will work.
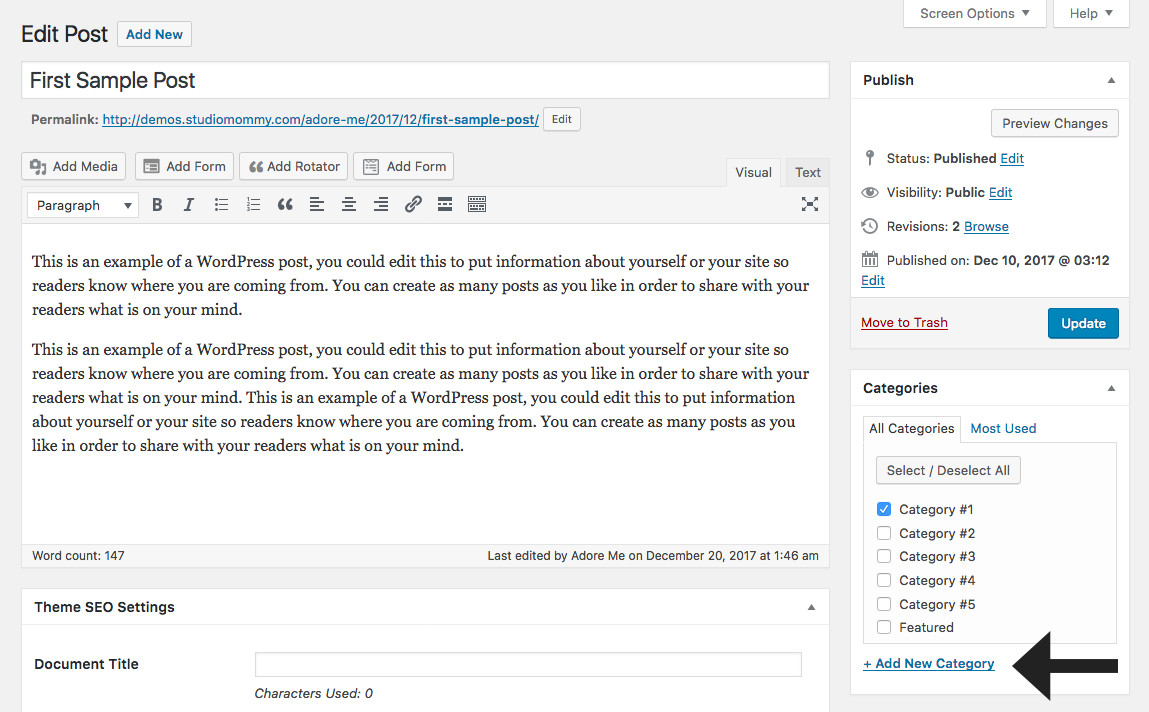
| Option 1 – When creating a new post look for WordPress Categories meta box on the right side of your screen. Click Add New Category to create a new category or choose an existing category by checking its box.
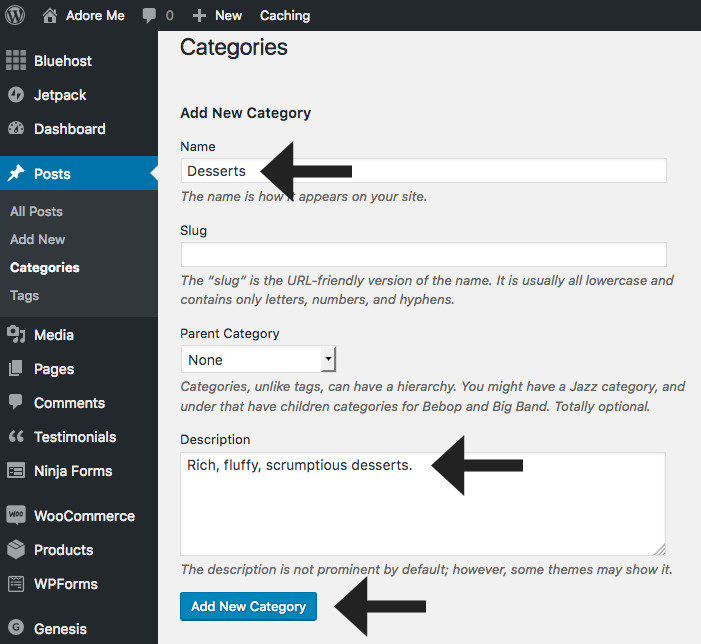
| Option 2 – This option is great if you want to pre-create all your categories before you create any posts. To get to this screen click on Posts then Categories (as shown in the photo below). Give your category a name and a description. You can also create your own slug but it’s not necessary. Most cases WordPress will use the name of your category for the slug. Click Add New Category when done.
How to Change the Default Category
Now that you know how to create your categories, you can change the default ‘uncategorized’ category (this is optional). If you would like to change the default category click on Settings then Writing. Choose your default category from the dropdown list next to Default Post Category. Then click Save Changes.
How to Use Categories
Categories can be displayed on your sidebar, footer, and your menu navigation bar. Here are 3 different ways to use categories.
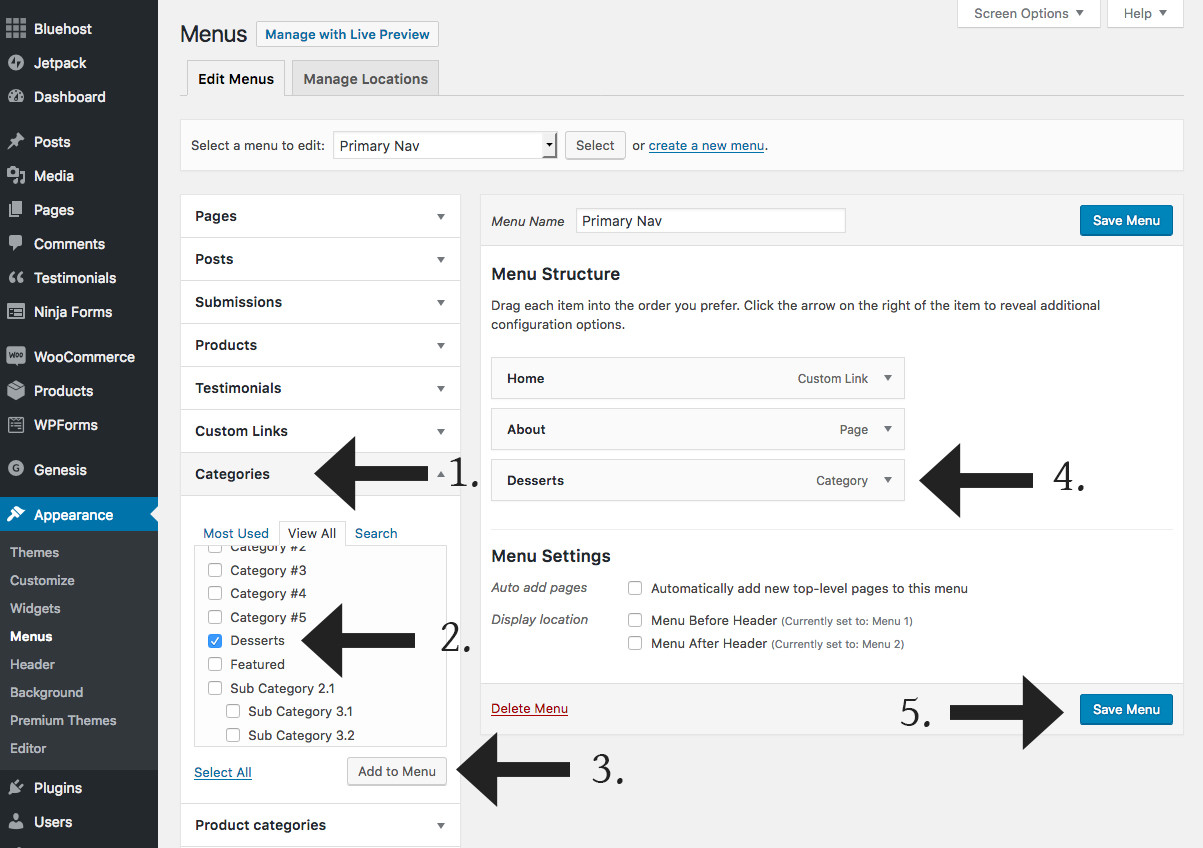
| Option 1 – Add it to your menu bar. Click on Appearance then Menus. Click on the Categories tab, check the box next to the category of your choice, then click on Add to Menu. See the image below. Once you see the category added to your menu structure click Save Menu.
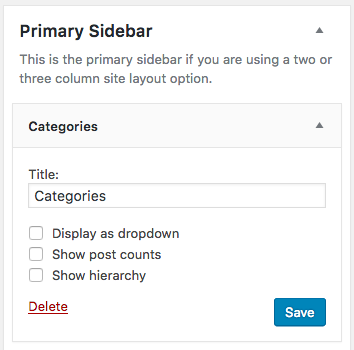
| Option 2 – Add it to your Sidebar or Footer. You can do this by going to Appearance then Widgets. Choose the Categories widget and add it to your sidebar or footer.
| Option 3 – Get the URL link to that Category. This is a great option if you need to use the link anywhere else on your site such as in a blog post. To do this, click on Post then Categories. Click View under the category name you want to get the link to. After you click View… copy the link at the top of your site. This is the URL to that specific category page.
Video Tutorial
Here is a video tutorial we created on how to use the Category page for the Her Exclusive and Adore Me themes. Please watch this.
More WordPress Tutorials
Are you looking for more WordPress tutorials? Check out these tutorials:
Hi 🤗! I want to help you create a website you love 💕 where you are excited to work or blog. Come see our easy to use, feminine, beautiful designs.

WordPress Themes

You’ve put in the work to make awesome content, now it’s time to dress up your site with a stunning design.

facebook
twitter
pinterest
share & save:
xoxo, april